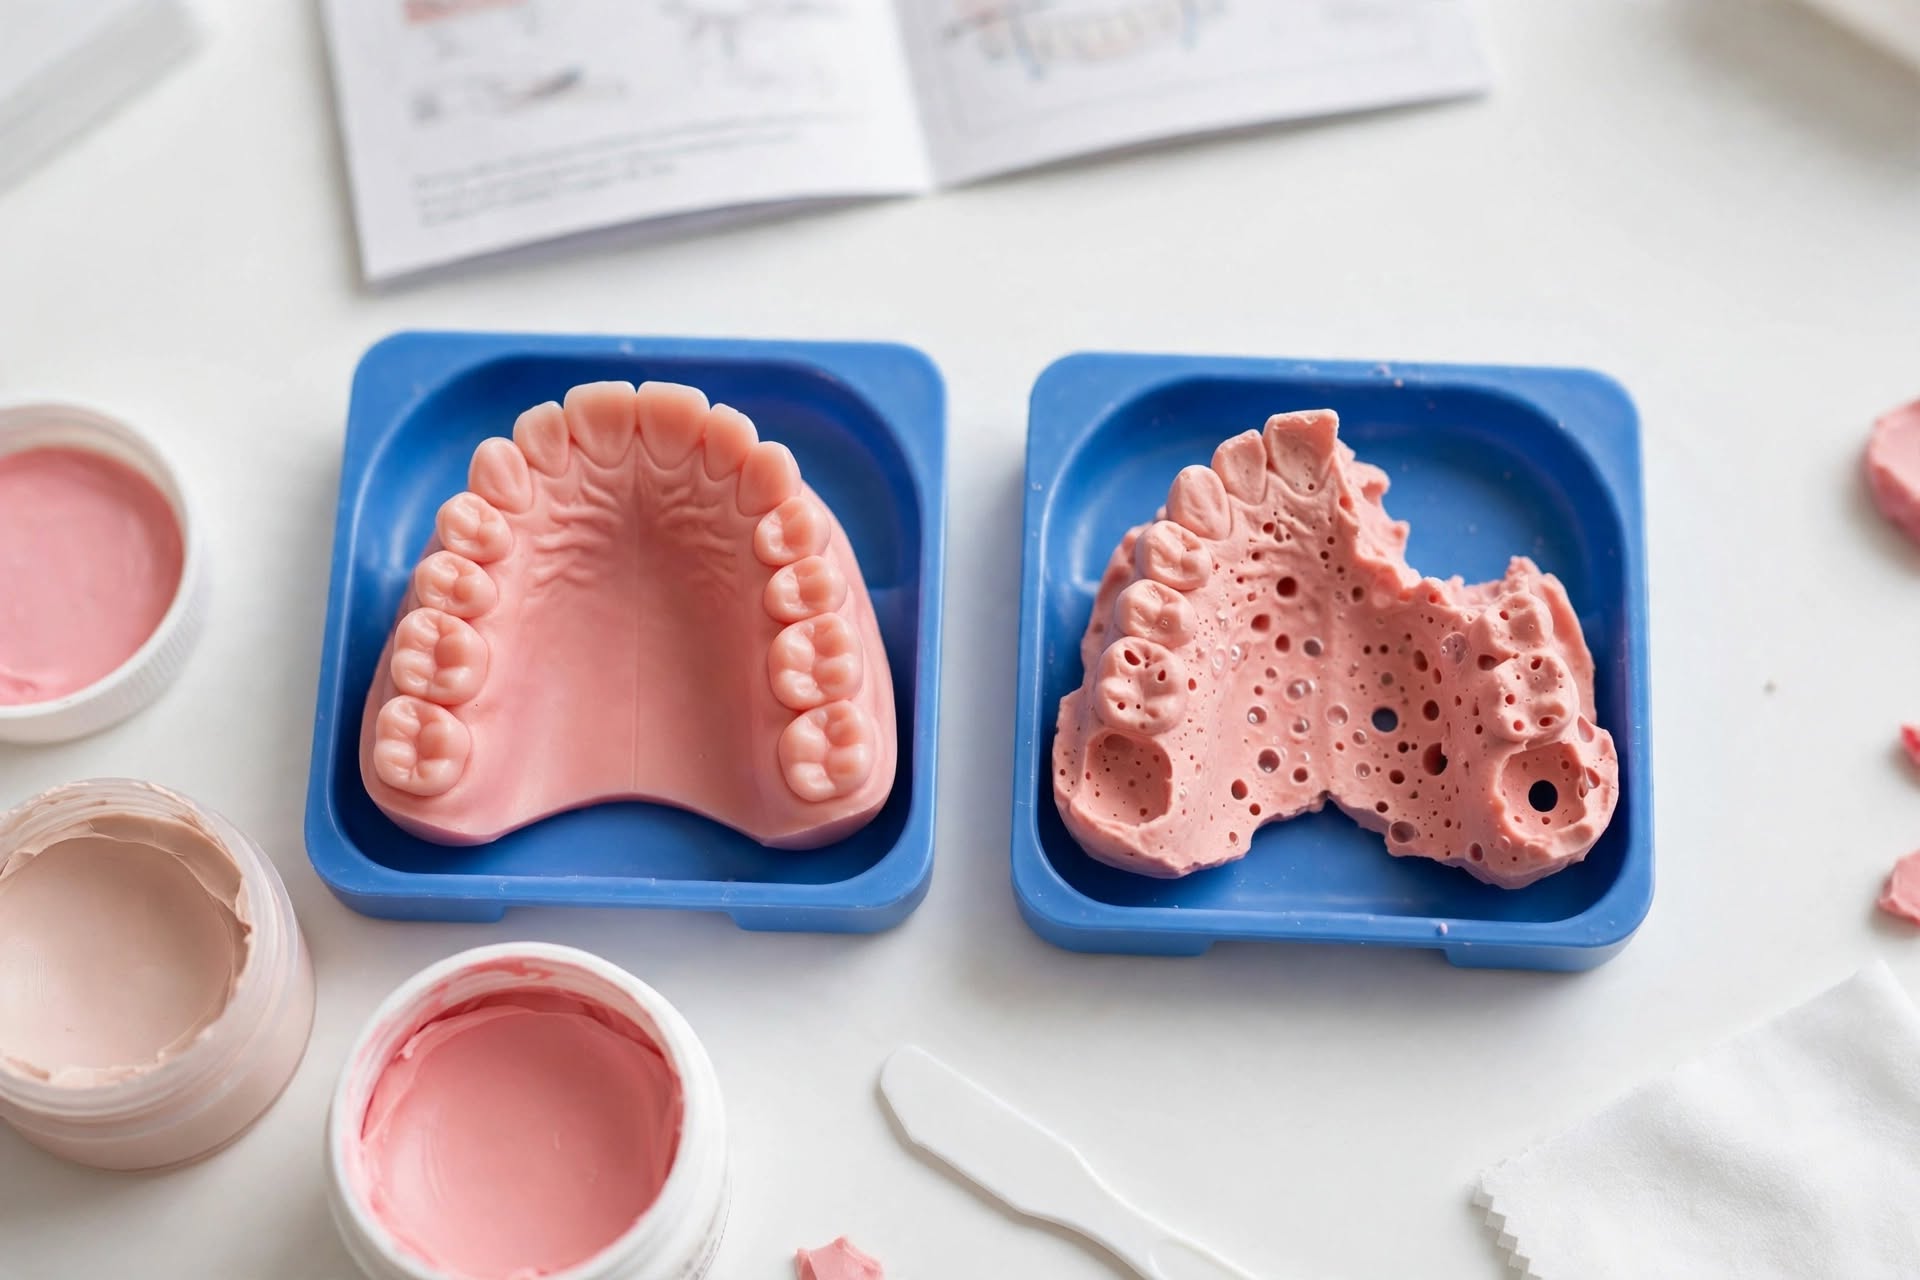
Knowing how to take dental impressions at home is the most important step in ordering a custom appliance, because your impressions are the blueprint for your partial denture, night guard, or retainer. A few minutes of preparation makes the difference between a good fit and a great one.
Always follow the printed instructions in your kit first. Mixing and setting times can vary by material. This guide adds practical tips that help you get a clean, detailed impression.
A clear impression shows every tooth and the gum line, with no gaps or tray showing through.
Before You Start
Read the whole kit guide once before opening any material so you know the timing.
Brush, floss, and rinse so your teeth are clean. Skip eating for about 30 minutes beforehand.
Remove any existing removable appliance (old partial, retainer, or guard) unless your kit says otherwise.
Do a dry run: place the empty tray in your mouth to practice centering it and learn how far back it goes.
Set up near a mirror and a clock or phone timer, with good lighting and clean, dry hands.
How to Take Dental Impressions at Home: Step by Step
Prepare the material exactly as your kit describes. If you’re mixing two parts, blend until the color is even with no streaks, and work quickly.
Load the tray evenly, filling it so the material covers the area where your teeth will sit without large gaps or air pockets.
Seat the tray: center it over your teeth, then press straight up (upper) or straight down (lower) with firm, even pressure until your teeth are fully embedded.
Hold still for the full set time listed in your kit. Keep your lips relaxed and gently pull your cheeks outward so the material captures the gum line.
Remove it in one motion: break the seal by wiggling gently at the front, then pull straight off. Don’t twist or peel, which can distort the impression.
Repeat for the other arch if your order includes upper and lower, or if your kit asks for both for bite alignment.
How to Check Your Impression
A good impression shows:
Every tooth in the arch, including the back teeth, with sharp, smooth edges
A few millimeters of gum tissue around the teeth
For partial dentures, a clear view of the gap where the missing teeth are
No large bubbles, tears, or spots where teeth pushed through to the tray
If you’re unsure, email a clear photo of your impression to info@fixursmile.com before you mail it. It’s much faster to redo an impression than to remake an appliance.
Common Mistakes to Avoid
Tray off-center, so the back teeth or front teeth are cut off
Moving before the material sets, which creates drag marks and a blurry impression
Pushing too hard, so teeth bite through to the plastic tray
Twisting the tray on removal, which distorts the impression
Leaving impressions in heat or direct sun before mailing
Why this matters: our Custom Fit Guarantee doesn’t cover fit issues caused by incorrect or distorted impressions, so a careful impression protects your fit and your time.
Don’t overfill the tray. Extra material squeezes out the back and is the most common gag trigger.
Seat the back first, then the front. This pushes material and air forward instead of toward your throat.
Sit upright with your chin down. Tipping your head back moves material toward your throat. Leaning slightly forward helps.
Breathe slowly through your nose for the whole setting time, and keep your eyes on the timer.
Packing and Mailing Your Kit
Let the impressions finish setting completely.
Rinse gently in cool water if your kit instructs you to, and let them air dry.
Place them in the bag or case provided and include any forms from your kit.
Seal the prepaid return package and drop it off. Return shipping to our lab is free.
Once your impressions arrive, a licensed dentist reviews your case, usually within 24–48 hours, before our certified technicians begin building your appliance.
How to Take Dental Impressions at Home: FAQ
How long does it take to take dental impressions at home?
Plan on about 20 minutes per arch, including setup. The material sets in a few minutes, so follow the exact set time printed in your kit.
What should I do if my impression has bubbles or missing teeth?
Don’t mail it yet. If any tooth is blurry or missing, or you can see the tray through the material, email our support team at info@fixursmile.com before you send it.
Do I need impressions of both arches?
Follow your kit and order instructions. Even if your appliance is for one arch, your kit may ask for the opposite arch so our lab can check your bite.
What happens after I mail my impressions?
A licensed dentist reviews your case, usually within 24 to 48 hours of arrival, and our lab makes your appliance. It ships within 3 weeks of us receiving your impressions.